
Basements are excellent storage places, but they can also be dangerous. If you’re thinking about building or remodeling your basement, you must know the step-by-step process and what it takes to build one.
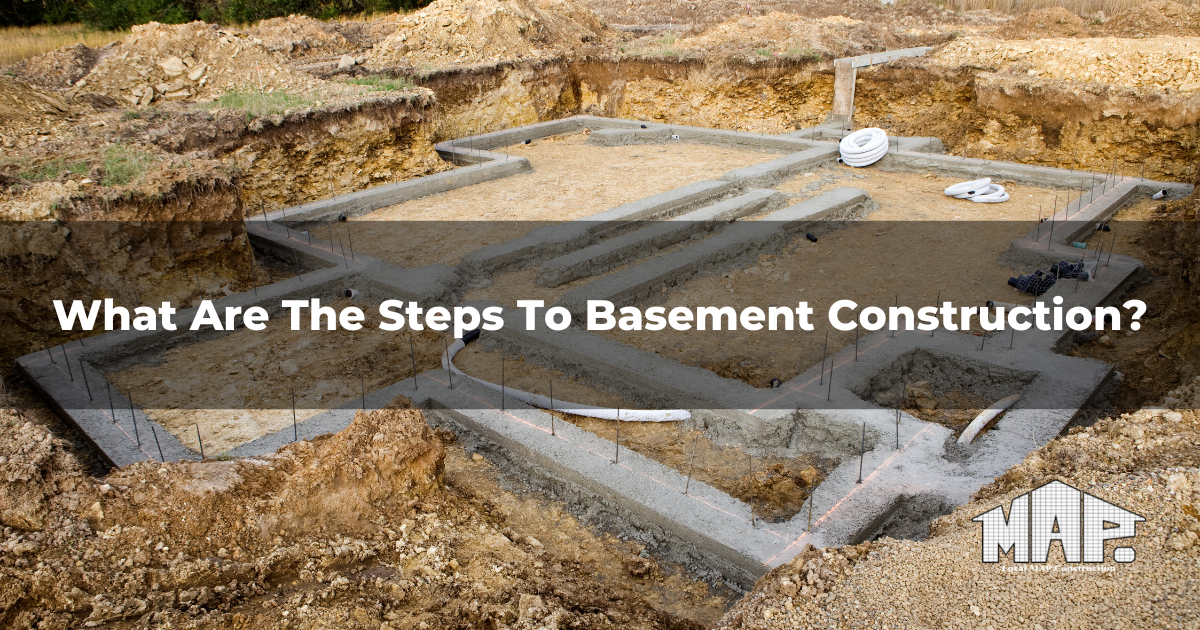
Constructing a basement is no small feat – it’s a complex process that requires careful planning and execution. Before a single shovel of dirt is turned, you must conduct site investigations to determine the project’s feasibility. Once you’re done clearing and ground leveling, the next step is installing pump systems to remove water from the basement excavations. Next, the concrete footing is poured into supporting the walls of the basement. Finally, the foundations’ walls and floors are constructed, and the space is finished to the home project’s specifications. With careful planning and attention to detail, it’s possible to create a functional and stylish basement that will be a valuable addition to any home.
Things You Need to Know About Construction Of Basements
For home projects, constructing a basement is not for the faint of heart – it’s a dirty, dusty, and noisy process that can take months to complete. But if you’re planning to build a new home or add an extension to your current property, you’ll need to know a thing or two about basement construction.
One of the most common types of basements is the poured concrete foundation, created by excavating soil in the ground and pouring concrete into it. This method is typically used for larger basements, providing a solid foundation for the building. However, it’s also more expensive than other methods and susceptible to cracks and leaks. If you’re looking for a cheaper option, you could opt for a crawl space basement, which is created by digging out a small section of earth and covering it with external walls. This construction method is less durable than poured concrete, but it’s much easier and quicker to construct. No matter which method you choose, make sure you hire an experienced contractor to oversee the construction process – after all, your basement will be one of the essential parts of your home.
Finishing Your Basement: A Step-By-Step Guide
Looking to spruce up your home but need help figuring out where to start? Why not begin at the bottom? Finishing your basement is a great way to add extra living space, storage, or even a workshop without venturing outside the existing building. And with basement windows, you can even bring in some natural light. Of course, before you start any basement projects, it’s essential to check the water table and make sure your basement is properly sealed and insulated. But once that’s taken care of, the sky’s the limit. So what are you waiting for? Start from the bottom and work your way up!
Finishing a basement can be one of the most rewarding home improvement projects you’ll ever undertake. But it doesn’t come without challenges. If you’re planning on finishing your basement yourself, here are some important steps to take before you start digging.
Prepare Your Space
Before you begin working on your basement, you need to prepare it properly. It’s important that all surfaces are clean and free from debris. In order to keep dust out of the air, you should seal off areas where there might be cracks.
1. Apply for a Permit
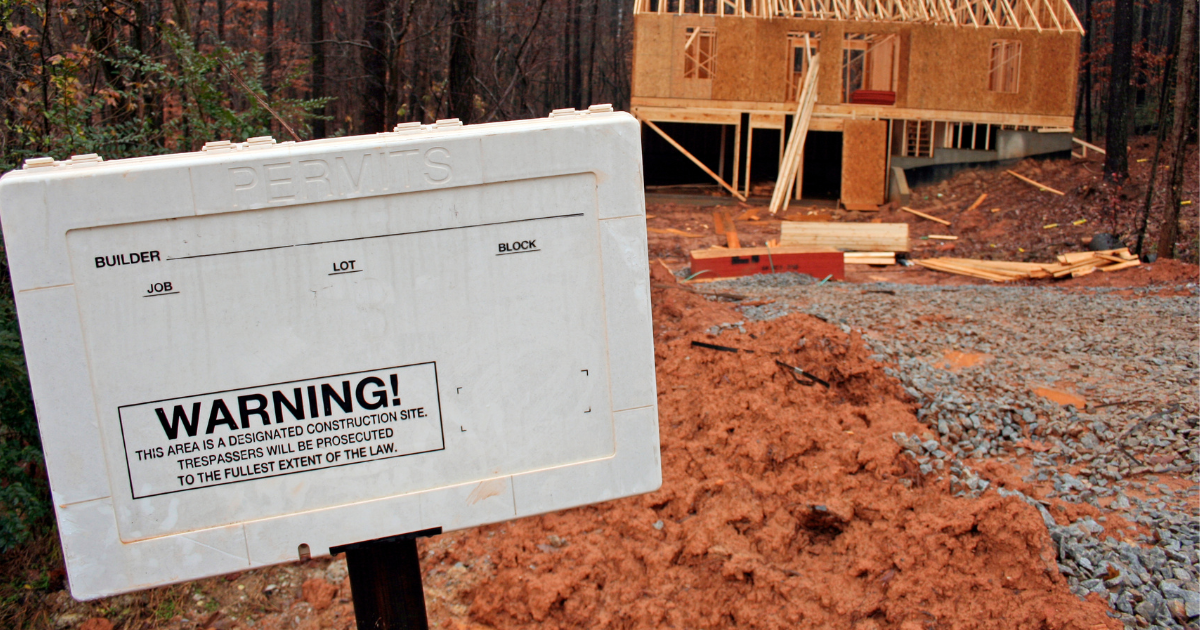
Just like any house construction, it’s recommended that you apply for a permit or planning permission prior to beginning your basement construction project. The permit allows you to do certain things, such as installing windows and doors and even getting electrical service installed. Even though you aren’t required to obtain a permit, it’s always good practice.
2. Pick Your Materials
You’ll need several different tools and materials in your construction site to complete the job. Make sure to have everything ready before you begin.
These are some of the things that you may want to consider:
wood
nails
screws
cement board
insulation type
wall material
flooring
paint color
ceiling style
trim style
3. Gather Your Tools
If you’re going to start or do basement remodeling by yourself, you’ll likely need a variety of tools. Here are some that you may want to have on hand:
hammer
level
saw
miter saw
drill
caulking gun
electric screwdriver
ladder
tape measure
masonry drill and bits
Don’t forget your safety gear!
How to Finish A Basement Wall
Basement walls are usually constructed from wood framing and drywall. If you want to add insulation to your basement, you’ll need to install batts or blankets between the studs. The final touch is finishing the room with paint and trim.
1. Install Insulation
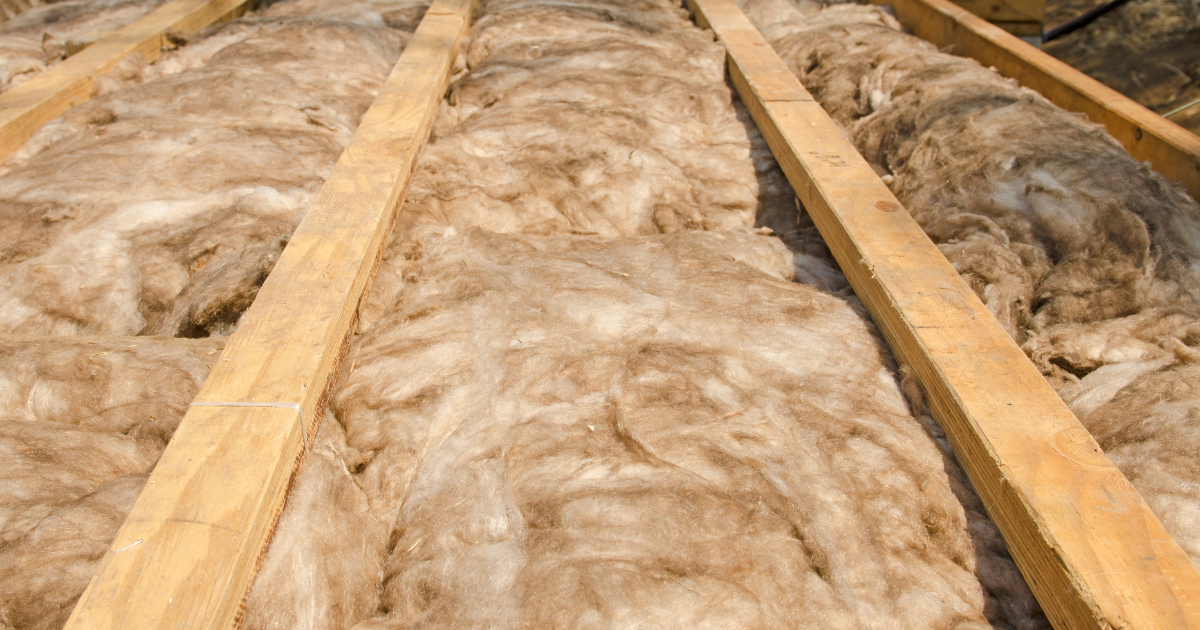
Installing insulation in your basement can seem daunting, but with some know-how, it’s pretty easy. The first step is to surface prep the area by ensuring the walls are clean and debris-free.
Next, you’ll want to measure the space’s perimeter and calculate the insulation you need. Once you’ve got your materials, installing the insulation is next. Start by attaching it to the wall of the basement using screws or nails.
Then, use a knife or another sharp object to cut the insulation to fit around any obstacles like pipes or structural supports.
Finally, seal gaps or cracks with caulk or spray foam to ensure your basement is properly insulated. You can make your basement more comfortable and energy efficient with just a few simple steps.
2. Frame the Walls
Framing the concrete walls is an essential part of the basement construction process. It is vital to use pressure-treated lumber for external walls to resist rot and insect damage. Internal walls can be framed with regular lumber, but studs should be spaced no more than 16 inches apart to provide support for drywall. When framing concrete walls, it is necessary to use metal or wood lath to give a surface to the mortar to adhere to. In addition, it is crucial to ensure that the frame is level and plumb to avoid problems later on. With careful planning and attention to detail, framing the walls of a basement is a straightforward process that any homeowner can complete.
3. Install Utilities
If you’re planning on adding a basement to your home, there are a few things you need to consider regarding utilities.
First, you’ll need to make sure the entire area is electric-ready. This means wiring throughout the crawl space and ensuring outlets are strategically located.
You’ll also need to do basement waterproofing as any moisture can damage electrical components and create a hazardous situation.
Most basements are below grade, which makes them susceptible to moisture and flooding. To protect your investment, it’s essential to plan your pump systems and install drain pipes and a sump pump to remove any water that does enter the space. In addition, concrete slabs should be appropriately sealed to prevent moisture from seeping through the floor.
Lastly, piled walls are another challenge you’ll face in your foundation trench, especially when installing utilities in your basement. Piled walls are layers of soil, rocks, and debris stacked on each other. They’re very strong but can be challenging to work with if you’re not careful.
These utilities are a crucial part of the construction method if you use the basement as a living space. This can be a complicated process, so hiring a professional is best to handle it.
4. Mount Drywall
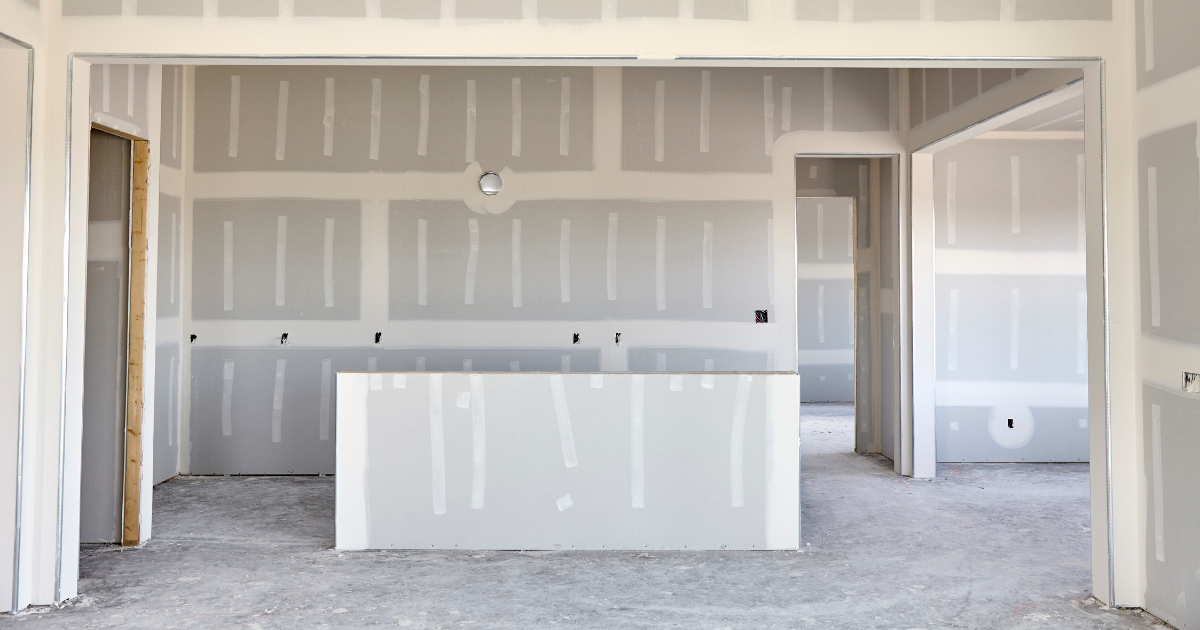
Mounting drywall in a basement is a bit different than other types of construction. The main difference is that you’re working with party walls and retaining walls, which means you have to be extra careful. The other thing to remember is that you’re working with much weight, so you must ensure that the mounts are secure.
First, take care of any corners. Not all ceiling corners are perfectly square, so it’s essential to use precut-angled pieces of drywall to create a tight fit.
Second, use screws rather than nails to attach the drywall to the ceiling joists. This will provide a more secure hold and help to prevent cracks.
Finally, remember joint tape and mud. These finishing touches will help to give your basement ceiling a professional look.
5. Paint
Whether you’re finishing your basement or just giving it a fresh coat of paint, there are a few things to remember when painting in the said construction project.
First, make sure the floor of your construction site is clean and free of debris.
Next, choose a paint designed for basement walls, which will help prevent mold and mildew growth.
Finally, apply a primer before painting, as this will help the paint adhere better and last longer.
How to Finish A Basement Ceiling
Aside from basement foundations, finishing a basement ceiling is a great way to add value to your home. But before you start, you should know a few things.
First, you’ll need to decide what material you want to use. There are a variety of options available, from drywall to acoustic tiles.
You’ll also need to consider the height of your basement ceiling. If it’s too low, consider raising it.
Finally, you’ll need to determine the best way to finish the edges of your basement ceiling. Once you’ve considered all of these factors, you’re ready to start completing your basement ceiling.
Drop-Ceiling Installation
If you’re planning on finishing your basement, one of the first things you’ll need to do is install a drop ceiling. Drop ceilings are an excellent way to add a complete look to your finished basement, and they can also help to reduce noise levels and improve energy efficiency. Here’s a step-by-step guide to installing a drop ceiling in your basement:
- Start by roofing your basement. This will help to lessen the chance of leaks and water damage.
- Once the roof is in place, lay the foundation for your drop ceiling. Be sure to use construction adhesive and screws to secure the basement foundations.
- Next, install the main support beams for your drop ceiling. These should be placed approximately 16 inches apart.
- Once the main beams are in place, you can start installing the cross beams. These should be placed approximately 24 inches apart.
- Once all of the cross beams are in place, you can start installing the panels. Be sure to use screws or nails to secure the panels in place.
- Finish off your drop ceiling by installing the trim pieces around the edges. Once again, be sure to use screws or nails to secure the trim in place.
Drywalled Ceiling
Before you start banging nails, there are a few things you need to know. Here’s a step-by-step guide to installing a drywall ceiling:
1) Before you do anything, make sure the area is well-ventilated. Drywall dust is not suitable for your lungs, so working in a well-ventilated space is essential.
2) To create a smooth surface, attach furring strips to the joists with screws or nails. Make sure the furring strips are level before continuing.
3) Once the furring strips are in place, cut the drywall panels to size and stick them to the furring strips with screws or nails. Use drywall screws designed explicitly for ceilings – they’re longer and have a different thread than regular drywall screws.
4) Once the drywall panels are in place, it’s time to tape the seams. Like with the wall of the basement, start by applying paper tape to the seams and then covering it with a joint compound. Use a putty knife to smooth the joint compound and create a seamless finish.
5) After the seams are taped, it’s time to mud over the screw heads. Apply joint compound over the screw heads and smooth it out with a putty knife. Let the mixture dry completely before sanding it down for a smooth finish.
Open Ceiling
Installation of an open ceiling in basement construction is more straightforward than one might think. It is an easy method that can be achieved in just a few easy steps. First, the building’s framing must be left open to accommodate the other materials used in the installation. Next, panels or beams can be installed to support the weight of the materials placed on top. Finally, the finishing touches, such as insulation and lighting, can be added. With a little bit of planning and some basic knowledge of construction, anyone can easily install an open ceiling in their basement.
How to Finish A Basement Floor
Most people don’t realize that their basement floor is a giant blank canvas just waiting to be filled with endless possibilities. Whether you’re looking to form an extra bedroom or home office or want more space for your growing family, finishing your basement floor is a great course to add value to your home.
1. Install Subflooring
Before you start installing the subfloor in your basement, there are a few things you’ll need to take care of first. Basement waterproofing is vitally important to preventing moisture damage, and you’ll also want to ensure you have enough space to work. Once that’s all taken care of, you’re ready to start installing your subfloor.
The first step is to install a vapor barrier over the concrete floor. This will help keep moisture from seeping up through the subfloor and damaging it.
Next, you’ll need to calculate the correct number of sheets of subflooring required to cover the entire area. Once you have that number, you’re ready to begin the installation.
To install the subfloor, attach each sheet of plywood to the joists using construction adhesive and screws. Ensure each sheet is secured correctly before moving on to the next one. Once all the sheets are in place, you’re finished! Your basement is now one step closer to being finished.
2. Install Flooring

Installing new flooring is an excellent way to update the look of your home and increase its value. When planning to finish your basement, selecting a suitable flooring material is essential. You’ll want to choose a material that can withstand moisture and handle foot traffic. Carpeting is a popular choice for basements, but it cannot be easy to keep clean. Tile or linoleum may be better if you have pets or children. Installing new flooring is a big job, so consider looking for a trusted professional who can do the job.
Saving Costs In Basement Construction
If you want to save money in your basement remodeling or construction, consider buying pre-cut drywall panels instead of cutting them yourself. Pre-cut drywall comes in standard sizes and saves the hassle of measuring and cutting pieces individually.
Pre-cut drywall also makes installation much easier because you don’t have to worry about making cuts perfectly straight. Instead, snap the panel into position and attach it with tape. You can use adhesive strips to secure the seams once the wall is finished.
Another way to cut costs is by purchasing unfinished basements. Unfinished basements come with insulation, wiring, plumbing, and installed ventilation systems. They usually cost less than fully finished ones. However, some homeowners find that unfinished basements need more character or foundation repair.
How Long Does It Take To Build A Basement?
Finishing a basement takes anywhere from two weeks to several months. The length depends on the types of basement or how many rooms you intend to create within the basement. A typical basement includes living areas, bedrooms, bathrooms, storage spaces, laundry facilities, and utility rooms. A good rule of thumb is to consume at least three days per square foot. If you have 10 feet of basement walls, you’ll probably need 30 working days to finish the job. Of course, this number varies depending on what kind of work you decide to perform.
Finding a good constructor for basement construction
A basement is often considered a necessary evil by homeowners who live in locations inclined to flood. However, basements aren’t just good places to store things; they’re pretty beautiful spaces. You can turn your unfinished basement into something extraordinary with careful design choices.
If you’re in Northern Colorado and looking for a reliable general contractor who can do basement construction in the best, fastest, and safest way possible, you should call Local Map Construction at 720-635-2941 or send an e-mail to get a response ASAP.
Check this out: Dos and Don’ts of a Finished Basement
Back to basement page.